The BlinkChat User Card is a detailed information hub that allows you to manage and personalize customer service in an efficient and organized way. Let’s explore each of the features available within this card, providing a clear overview of how they can be used to improve customer service.

1. Manually Change Contact Name: Within the card, you have the option to manually change the contact name. This feature is useful when the name provided by the user on Instagram does not match their real or preferred name, allowing for greater personalization in customer service and better internal organization.
1. Access the User Card: To begin, locate the card of the user you want to edit. This card is accessible by clicking on the contact's name or profile picture in the chat window. The card provides a detailed view of the contact's information, including their current name and other associated data.
2. Locate the Edit Icon: At the top of the user card, to the right of the contact's name and directly above their profile picture, you'll find a blue pencil icon. This icon indicates the edit function and is the access point for modifying the contact's name.
3. Click on the Blue Pencil Icon: Click on the blue pencil icon to begin the name editing process. This will open an editing field directly on the user's card.
4. Enter New Name: In the edit field, enter the new name you want to assign to the contact. You can use the user's real name or any preferred name that facilitates internal organization and personalization of the service.
5. Save Changes: After entering the new name, be sure to save your changes. Most interfaces will automatically apply the change after editing, but in some cases you may need to click a "Save" button or confirm the change. Make sure the updated name is reflected correctly on the user's card.
2. Notes for Contact:
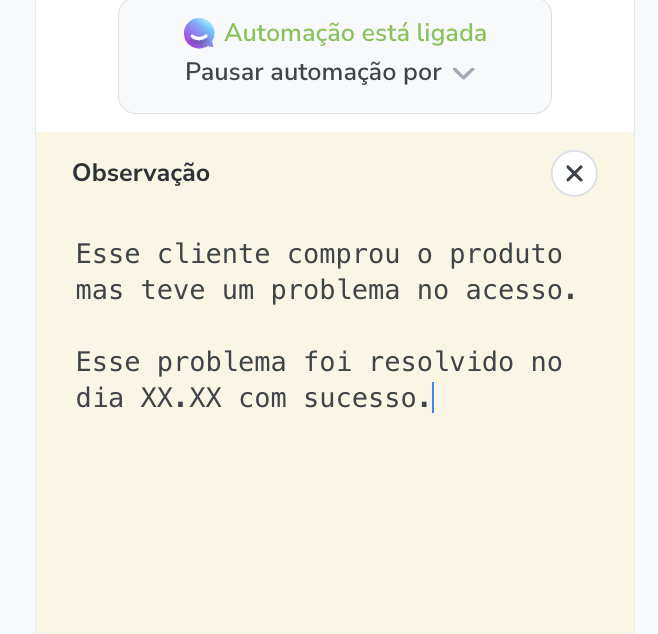
BlinkChat allows you to add detailed notes about your contact that are accessible to your entire team. These notes are essential for capturing important information that isn’t captured in other fields, such as specific customer preferences, issue history, or relevant contextual details. This ensures that any team member who interacts with the contact is fully informed.
2.1 How to Add Notes to Contact in BlinkChat
Adding notes to a contact in BlinkChat is an important feature to record and share detailed information that helps improve communication and service. Here is a step-by-step guide on how to add and manage notes for contacts:
1. Access the User Card: First, locate the card of the user you want to add a note to. You can do this by clicking on the contact's name or profile picture in the chat window, which will display all the information associated with the user.
2. Locate the Notes Icon: At the top of the user card, next to the contact's name, you'll find an icon shaped like a green document with a + symbol. This icon is used to add or view notes related to the contact.
3. Identify the Icon Status:
- Green Icon: If the icon is green, it means that no notes have been added for this contact yet.
- Orange Icon: If the icon is orange, it indicates that a note has already been added for the contact. This helps you quickly see if there is additional information available.
4. Click the Icon to Add or View Notes: Click the green document icon (or orange, if a note is already present) to open the notes pane. If the icon is green, you will be taken to an area where you can add a new note. If the icon is orange, you will see the existing note and have the option to add new information or edit the existing note.

No note added

With note added
5. Enter Detailed Note: In the notes panel, you can enter any information you want. Be detailed and specific when recording important information, such as customer preferences, issue history, or any relevant contextual details. These notes will be visible to the entire team and help ensure that everyone is well informed about the contact.