Introduction to Live Chat
BlinkChat’s Live Chat is a powerful feature for streamlining customer service on Instagram. It allows all direct messages to be mirrored in real-time, giving your support team the ability to monitor and engage with customers in an efficient and organized manner.
We understand that providing exceptional customer service is essential to standing out. BlinkChat transforms the way you monitor your Instagram conversations. This tool not only facilitates real-time communication, but also unlocks tools for direct messages that make customer service more agile and personalized.
Additionally, Live Chat provides a comprehensive view of contact information and conversation history. This includes the status of the contact (open or closed), registration date, profile tags, associated campaigns, and custom fields. This information is crucial to understanding the context of each interaction and providing a more accurate and effective response.
And to ensure nothing gets lost, you can add notes to profiles, keeping the entire team informed and aligned on the most important details of each case. With BlinkChat, you not only improve the efficiency of your service, but you also build a stronger and more personalized relationship with your customers, increasing their loyalty and expanding your business opportunities.
Summary
- What is it?: Live Chat allows operators to communicate in real time with Instagram visitors.
- Main Features: Includes notifications for new chats, the ability to transfer conversations between operators and an easy-to-use interface.
- Benefits: Improves relationships, offers a personalized experience for customers and facilitates the quick resolution of queries.
- Usage Examples: Can be used for customer support, sales assistance, answering frequently asked questions and strengthening good relationships with your contacts.
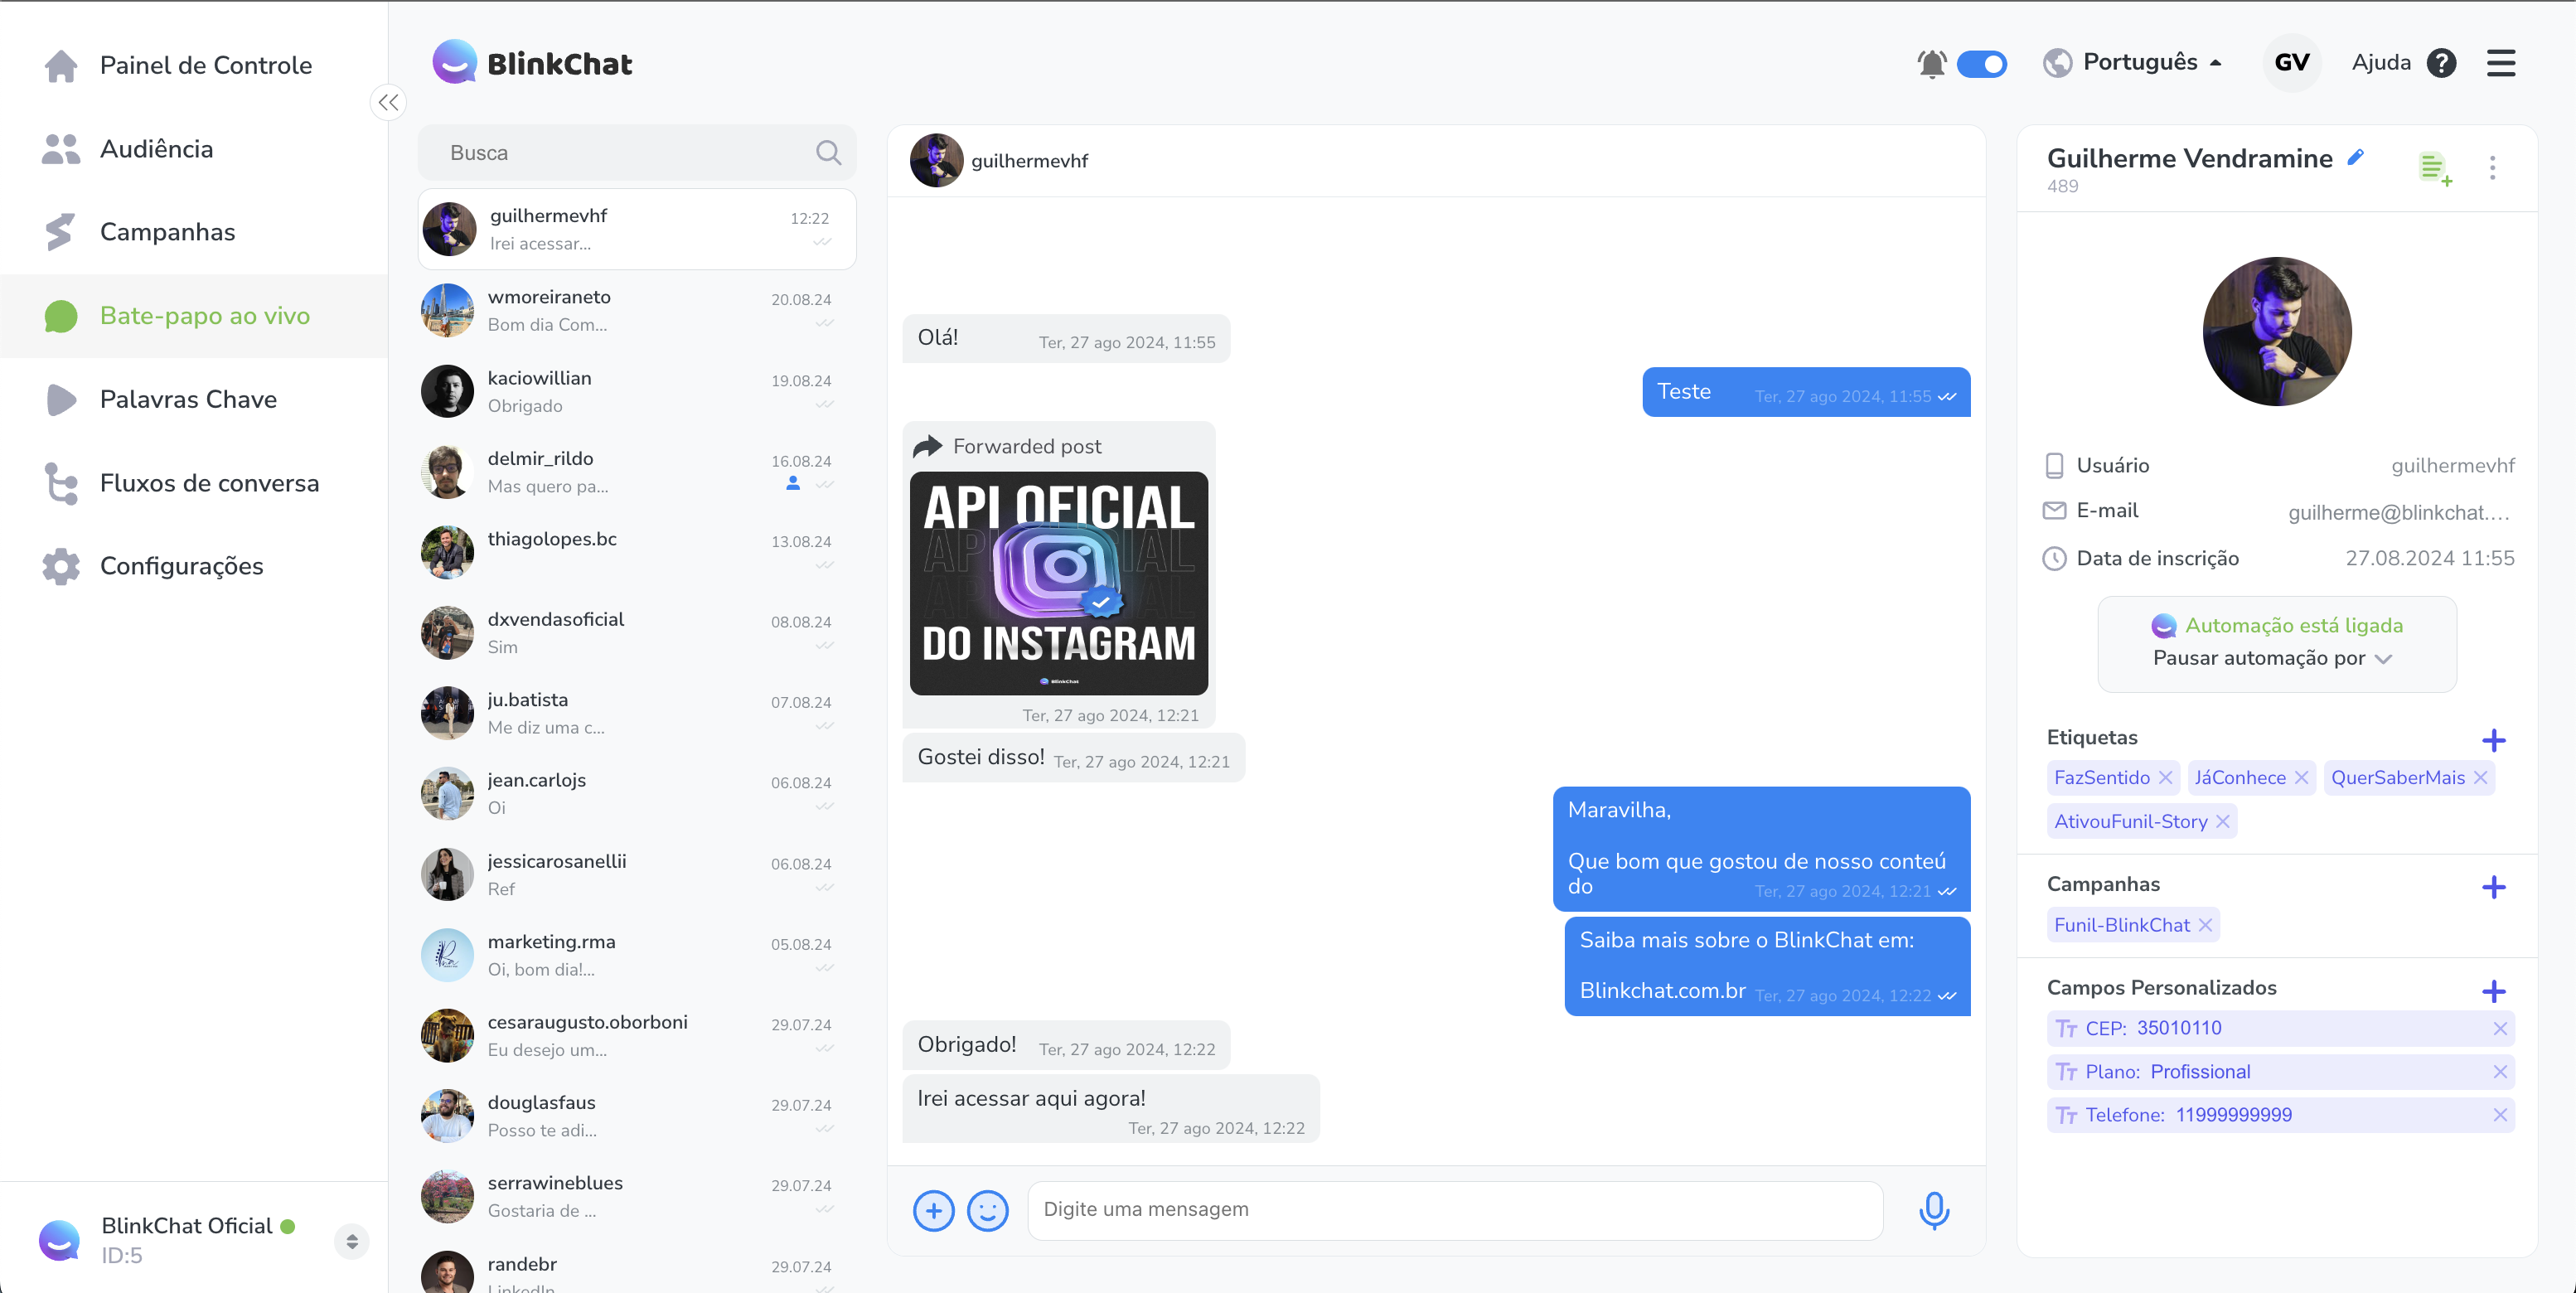
General Chat Interface in BlinkChat
The BlinkChat Chat interface is designed to be intuitive and efficient, making it easy to communicate and manage interactions with customers on Instagram. Here are the main features available:
1. Conversation History:
Live Chat in BlinkChat allows agents to view conversation history, which is essential for understanding the context of interactions and providing more informed and personalized responses. From this interface, agents can respond directly to Instagram direct messages, ensuring continuity of communication.
2. Sending Images and Videos:
Operators can manually send images and videos over chat, providing richer, more visual communication. BlinkChat supports:
- Videos in MP4 format with up to 15MB, ideal for sharing visual content such as tutorials or promotional messages.
- Images in JPG, PNG, JPEG, and WEBP formats, with a limit of up to 2MB per file, useful for sharing product photos, graphics, or other relevant images.
2.1 How to Send Images and Videos via Chat
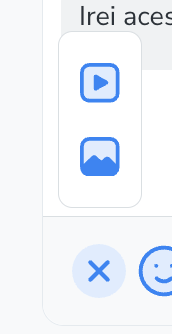
To send images and videos via chat on BlinkChat, follow these detailed steps to ensure your content is shared correctly and efficiently:
1. Access the File Sending Icon: In the bottom center corner of the chat screen, you will find an icon with a + symbol. This icon is located next to the happy emoji icon in the message sending bar. Click on this icon to start the process of sending images and videos.
2. Select File: When you click on the + icon, a pop-up window will appear, allowing you to browse the files available on your device. Here, you can choose the type of file you want to upload:
- For Images: Select files in JPG, PNG, JPEG, or WEBP formats. Keep in mind that the size limit for images is up to 2MB.
- For Videos: Choose files in MP4 format with a maximum size of 15MB. This capacity is ideal for sharing visual content such as tutorials, presentations, or promotional messages.
3. Confirm File Selection: After selecting the desired file, click "Open" or "Select" (depending on the operating system you are using). When you confirm the selection, the system will immediately send it to the contact in the Instagram direct message.
3. Sending Emojis: To make interactions more expressive and personal, agents can use emojis. These icons help convey emotions and tones that complement the written message, improving the connection with customers.
3.1 How to Send Emojis in Chat
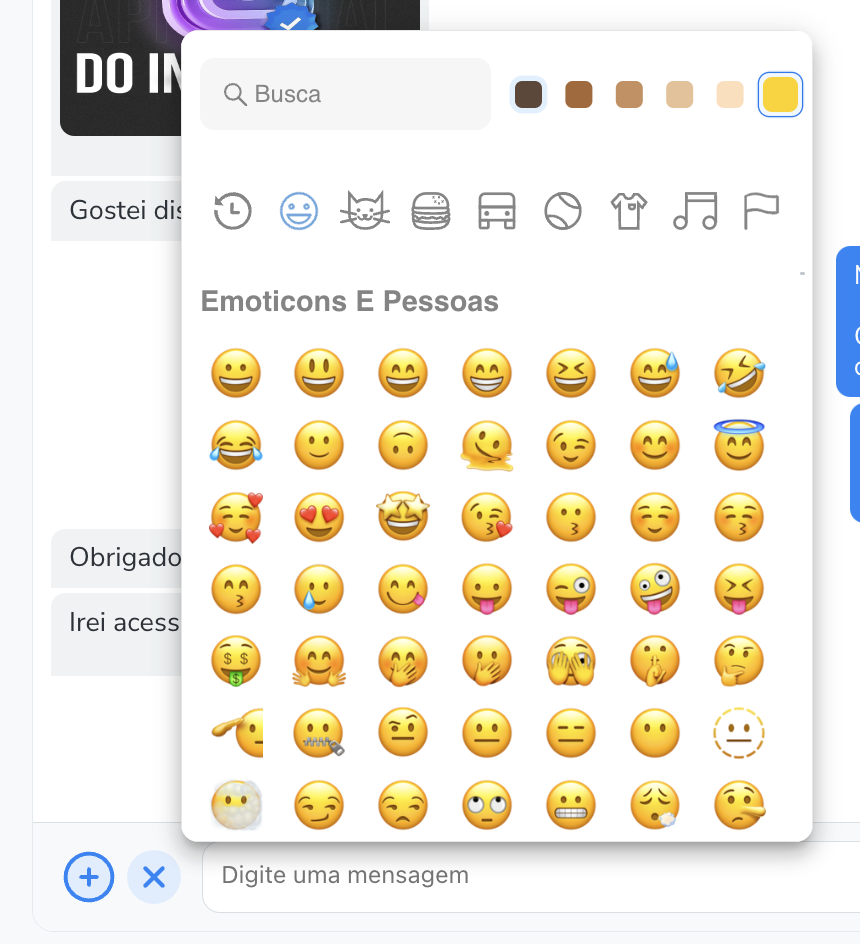
Sending emojis in BlinkChat chat is a convenient and efficient way to add a personal touch to your conversations. Emojis help express emotions and make communication more vibrant and engaging.
1. Locate the Emoji Icon: At the bottom of the chat screen, in the message sending bar, you will find an icon with a smiling face, which represents emojis. This icon is located next to the + icon, used to send files.
2. Access the Emoji Panel: Click the smiley face icon to open the emoji panel. This panel displays a wide range of emojis organized into several categories, such as smiley faces, animals, food, activities, and more. Viewing the categories allows you to quickly find the emoji that best fits your message.
3. Browse and Select Emoji: Within the emoji panel, you can browse through the different categories or use the search bar to quickly locate a specific emoji. Once you find the emoji you want, click on it to insert it into the message text area. The emoji will automatically be added to the message you are composing.
4. Add Multiple Emojis if Necessary: If you want to include more than one emoji in your message, continue selecting and clicking on the desired emojis. They will be added in the order you select them, allowing for more expressive and diverse communication.
5. Send Message with Emojis: After adding emojis to your message, review the text and emojis to make sure they are correct. Then, click the send button, usually represented by an arrow icon.
The message, along with the emojis, will be sent to the contact via Instagram direct message.
4. Recording and sending audio:
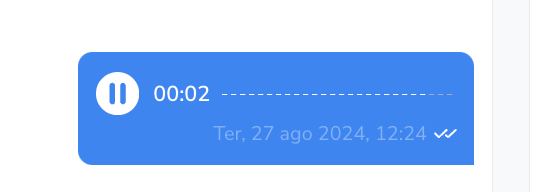
BlinkChat allows you to record audio messages, which can then be sent directly via chat. This feature is useful for more complex communications or when you want to convey a message more personally and quickly.
4.1 How to Record and Send Audios via Chat

Recording and sending audio in Chat is a valuable feature that allows you to convey messages in a personal and effective way. To use this tool effectively, follow this detailed guide:
1. Start Recording Audio: To start recording an audio message, locate the microphone icon, which is usually located next to the message sending bar. Click on this icon once to start the recording process. When you click, you will see a timer start, indicating that the recording is in progress.
2. Record Audio Message: While the timer is running, start speaking to record your audio message. Hold the microphone close to your mouth to ensure the audio is clear and audible. The recording will continue until you finish the process or cancel the recording.
3. Canceling the Recording: If you decide not to send the audio message, you can cancel the recording at any time. To do so, click on the red X icon located in the left corner of the screen. This will stop the recording and discard the audio. The recording process will stop, and the audio message will not be sent.
4. Finalizing and Sending the Audio: If you are satisfied with the recording and want to send the audio message, click on the blue check icon located in the right corner of the screen. This will confirm the recording and send the audio message to the contact. Once the audio is sent, it will appear in the conversation and can be played by the recipient.
5. Sound Notification:
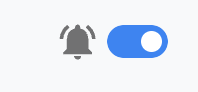
The interface includes an audible notification feature that alerts operators to new incoming messages. This option can be turned on or off via a gear in the interface, allowing staff to tailor notifications to their preferences and operational needs.